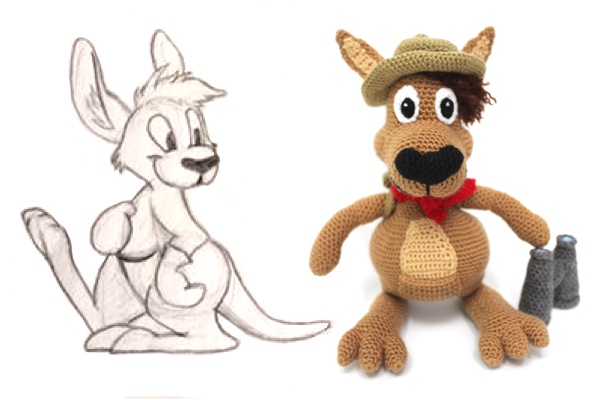
Would you like to create your own amigurumi designs?
Do you want to learn how to design amigurumis and do not know where to start? …
From time to time you ask me how I design my patterns, you have even asked me to do a lesson to learn how to design amigurumi patterns.
I have done a search and the truth is that there is not much information about it, so I will try to explain the process that I follow to design my amigurumi patterns:
Are you ready? … Well, first:
1.- THE IDEA
What amigurumi I´m going to crochet? a little animal? A character that already exists? An invented one?…
In my case I crochet many characters that already exist. Some because they seem original to me, they bring me memories or I just like them.

Others, however, I do according to your requests or suggestions. You are a great inspiration because some of them I do not know and thanks to you I am learning new things.
If you want to send your suggestion to design a pattern you can do it here.
Amigurumis of existing characters:
Designing patterns of famous characters has its advantages (they are known, popular, their image is already created, etc.), but also many disadvantages:
- The first is that others designers can also make them and comparisons are inevitable.
- Its image is already in our head, so we must try harder to be original but at the same time maintain its essence.
- If we decide to be too risky in the design we run the risk that the differences with the original are so big that it don’t end up liking.
- On the other hand, if we try to be too faithful to the original, it is very possible to end up feeling a great frustration and give up the project, as we are unable to “amigurumize” the ideal character.
As in any creative process, it´s best to opt for a midpoint and to achieve this, I advise you to previously analyze the character through a lot of images of it, to capture the main aspects, but also observe details that can make a difference.
Original Amigurumis:
Making an invented amigurumi is the ultimate expression of our creativity.

You may think that starting the process from scratch is slower and involves more work, but this does not have to be the case.
We have absolute freedom to do what we like, what we need or simply what we can.
So, if something doesn’t work out, we change it to an alternative option that may even be better than the original idea.
Inspiration is found anywhere and almost with anything. An object, a photo, a drawing … can give us an idea that we need to shape with our yarns.
In my case, I am inspired by cartoons, Japanese anime, everything kawaii and chibi, but also decorative figures, stuffed animals, toys, the world of children in general.
Big eyes, rounded shapes, thick dolls and you know: all soft.
2.- THE SKETCH
To design an amigurumi we must have a clear image of what we want to do.
A priori, the ideal would be for us to draw it, but luckily, for me and for all those who are not very good artists, drawing is not essential.
What can we do if our level as cartoonists is the same of a 3 year old child?
Don’t panic.
As you’ve seen, I’m talking about having an image of what we want to do but taking it from the broadest sense of the word.
We must have a clear idea in our mind, an idea that we can put in writing describing the details we must retain or through a sketch that does not imply artistic quality.
The image is made for us only, as a guide, so we will use the resources that serve us to achieve this purpose.
I’ll give you a practical example to make it clearer: The idea of the kangaroo scout of my amigurumi animals ebook was given to me by a weaver companion.
In the beginning the project was to make a boxing kangaroo, but since I do not like violence, even if it’s a sport, I convinced her to be a kangaroo scout.
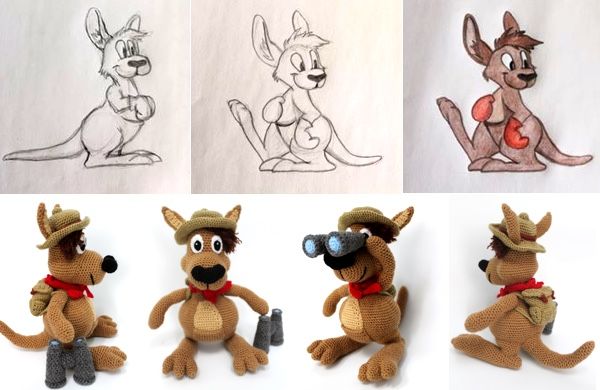
Starting from this idea, in my imagination the image of what I want to do is born, I take notes: the pieces that it carries, that stand up, thick legs, big eyes, shape of the body, details, …
In this case, my friend made some sketches from an internet drawing. This visual reference and the simple annotations or sketches will help us to have a clear idea of what we are going to create.
As my amigurumi is taking shape, I’m looking, when I need it, to the reference model, which I have on hand, for example with a photo on the mobile phone, but having in mind the clear image of what I want to do, in fact, I evoke that drawing that I have not made of my future amigurumi. In other words, I don´t see the real photo, but the image of my amigurumi.
3.- MATERIALS
How much yarn will we need? What colors?
It is important to plan the purchase of materials and not rush, especially if your budget is tight.
First of all, you should think about the size of your amigurumi.
If you do not have too much experience crocheting amigurumis but you want to venture to design one by your own, it is best to start with something small.
Making a simple pattern will be a guaranteed success and will give you experience and confidence to go further.
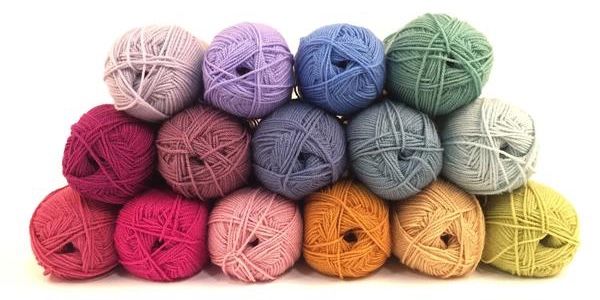
Colors of the yarn
Your idea is clear, but sometimes, the reality is very different.
It is very common that the wonderful yarn color of our design is not available.
So, unless it’s something really essential, the most practical is to choose the usual range of colors and acquire, in addition to those you need for your pattern, the basic ones.
Do not forget that while you elaborate your amigurumi and give it shape, you will need alternatives since it is very common that when you physically see your creation you can realize that it does not look as good as you thought.
- White and black can not miss.
- Also, I recommend having at least 2 tones (light and dark) of blue and 3 of brown (one will be for skin tone).
- Complete the basics: red, yellow, green, pink, orange and gray.
The rest of the materials are what we normally use to crochet the amigurumis.
If you want to know more about the type and thickness of yarn that you should use to crochet amigurumis, I recommend you visit this post: Materials and accessories to crochet amigurumis.
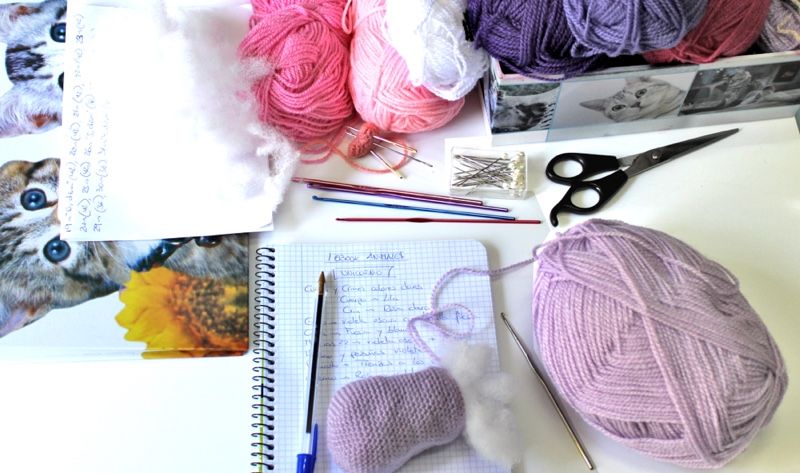
Prepare notebook and pen …
Naturally, you should make notes of all the steps as you give shape to your amigurumi.
Choose the materials that are most comfortable for you to write. It will be a complete back to school!
Notebook, paper, a filing cabinet, a folder, pen, pencil, rubber … the essential to write, correct the writing and put everything in order.
4.- LET’S CROCHET…
Everything is ready to start crocheting.
The amigurumi structure will tell you the piece you should start with:
- If it´s standing with the legs together, I begin with them. The beginning will be by the feet if it is barefoot or if the shoe is not very bulky.
- If it’s sitting or with its legs apart, the body will come first, starting at the bottom to finish at the neck.
I try to make the small amigurumis in one piece, starting with the head.
Other amigurumis like objects, vehicles, etc, I design them starting from the main structure, the basic piece, from bottom to top, that is, from the base to the highest part.
Shaping it …
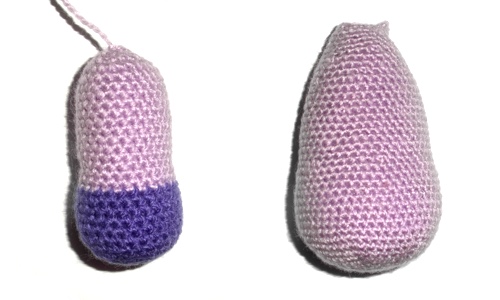
The first rounds, named “Increasing Rounds”, serve to form the width of the figure. With them we can choose the size of the piece.
The next rounds, in which we will not change the number of stitches, help us to determine the length. Named “Fixed Rounds”. By varying the number of rounds we change the shape of the figure creating a perfect circle, one more squashed, elongated, etc.
The final rounds or “decreasing rounds” will be the same as those of increase, but in reverse. They close the figure.
With these concepts we can create any three-dimensional shape that we need.
For the flat pieces I recommend you take a look at the post: Use of Chains and Stitches in Amigurumi.
5.- SOME MATHS
At this point you can no longer back out!
Don´t worry, you do not need to be a genius to design your pattern, but it´s true that you must consider certain aspects to ensure that your design has symmetry.
Why do I talk to you about maths? Very simple, because we want or not, the numbers are part of our pattern and a result or another will depend on its correct combination.
So, we have number of rows, total number of stitches, number of times we repeat a sequence, number of increases, decreases or stitches that form that sequence … as you see in the design of an amigurumi come into play many variables and the best or worst result will depend on whether we combine them with greater or lesser accuracy.
If you want to go deeper into these concepts, take a look at this post: Analysis of a Amigurumi Pattern.
6.- TEST / MISTAKE
Although the application of mathematics seems a guarantee of success, the truth is that it´s not.
As I said, there are many variables and finding the one you need to give the desired shape to the piece, can sometimes be exasperating.
Test, see the result, that you do not like, undo, modify, retest, is something you have to mentalize yourself about.
Don’t despair, you will learn from your mistakes and experience will make things easier for you, but you will always find something that you don´t like and that you will have to undo to start over.
I recommend that you take a look at the post 3 Mistakes you should avoid when crocheting amigurumis.
7.- PHOTOS
I’m not an expert in photography, you’ve already noticed. But hey, little by little I get better photos. And everything is a matter of practice.
Here are some tips that I have learned by trying and trying, so you can save time trying:
1.- Use natural light: I know, I don´t take photos of the process with natural light, as I usually crochet at night … For the photos to look good, in addition to ensuring that the lighting is enough, I use the flash of the camera and eva rubber as a background for each piece , since it does not create any reflection. But I do recommend that you use the light of day to take pictures of your amigurumis. The result is noticeable.
2.- Light Box: Otherwise you can use a light box. It is used to illuminate photos and generates indirect diffuse soft light. You can find them in many ways in the market, you can even make a homemade one, and they are ideal for catalog photos.
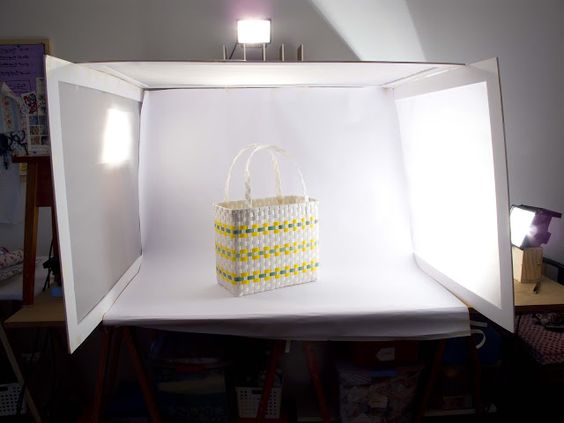
3.- Less is more: Eliminate distractions from the background. In my case I use white backgrounds. I use foam core board or eva rubber to achieve this, but you can also use them in different colors or other materials such as cardboards to create a nice background for your amigurumi.
4.- Take lots of photos: They are never enough. Each amigurumi is different and you must photograph it from different distances, angles, positions, to have several options and choose the best ones. When you see them all together you will notice which ones you can use and the discards (off center, out of focus, blurry, with shadows …)
5.- Edit the photos: Normally the photos taken by the camera are usually a bit dark, so I recommend you give them a little bit of brightness and contrast with some photo editing program, such as Photoshop or Pixelmator.

Notice the difference of colors:
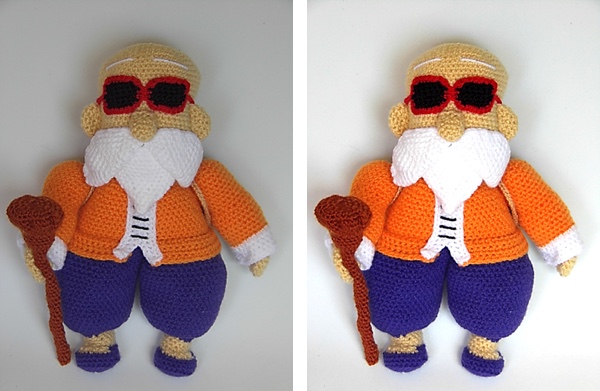
Much better color, right? It has more life … But be careful and don’t go too far, or it will not look good.
For the pattern to be well illustrated, I try to take pictures from step by step.
I do it after every important change in the pattern:
- Sequence change
- Color change
- Starting a part …
And when I finish the piece, I take pictures from different angles if necessary.
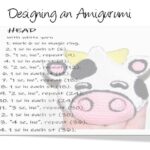
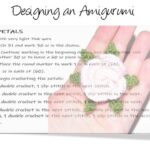
In the design of the pattern I use 2 columns, the one on the left for the stitches and the one on the right for the photos.
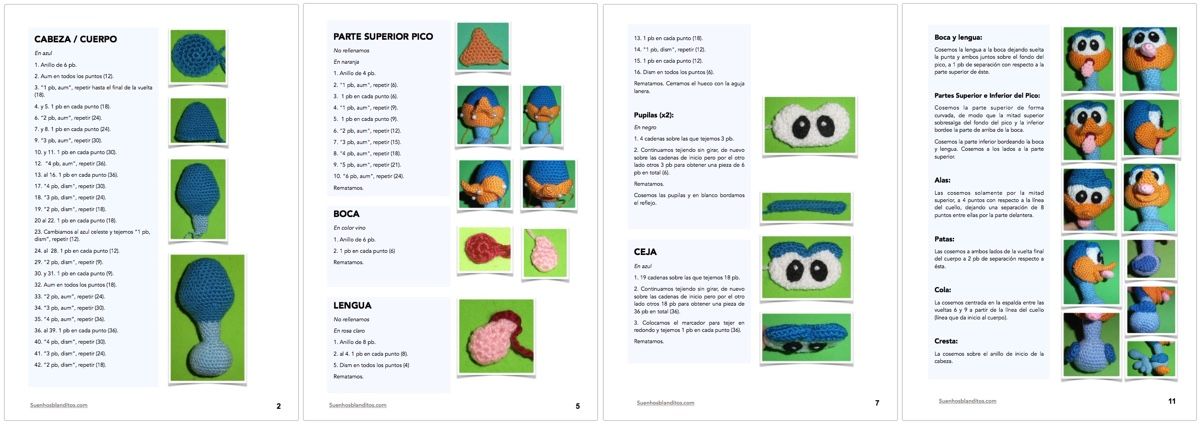
8.- THE PATTERN LAYOUT
The design and layout of the pattern is important. I use a program called Pages. It’s for mac, but you can use it even if that is not your operating system through Apple iCloud .
Then I print it in PDF and I compress it in this web: smallpdf.com , so that it weighs little and is optimized.
And ready! We have our finished pattern. Now we just need to test it.
I recommend that you send your pattern to other weavers so they can crochet it, since there is always a mistake or detail that can escape you.
CONCLUSION
As you see, designing amigurumi patterns takes work, but with patience and a needle everything comes out.
The experience will make you create your own style, but you will only get there if you are constant and you like what you do.
I really love what I do. I enjoy the process. And the greatest reward is to see your finished amigurumis. That has an incalculable value for me.
And you? Do you dare to design your own amigurumi patterns?
I would love to know your opinion. Tell me about your experience in the comments.
Share this Tutorial:
[addthis tool=”addthis_inline_share_toolbox_djcd”]




Gracias por compartir tanto con nosotras, lleva su tiempo y trabajo, pero como tu dices la satisfacción de ayudar a otras personas, yi nunca he hecho un oatron propio pero con tus indicaciones voy a probar a hacerlo, al igual que a ti me fascina ek mundo de los amigurumis y en general el crochet, ya te contaré como fue mi experiencia, muchisimas gracias, saludos desde Marbella
Me alegro mucho Cornelia!
Claro que sí, debes probar sin miedo! Ya verás como disfrutas tejiendo tu propio amigurumi.
Me encantará saber cómo te ha ido.
Saludos!
Muchas gracias por compartir todo lo que sabes , es tiempo q dedicas y q yo agradezco enormemente. No se si alguna vez me atrevere ha hacer mi propio patron. De momento me siento mas comoda tejiendo con patrones ya hechos jeje. Muchas gracias por todo
Gracias a ti por comentar. Seguro que algún día te animas, ya verás. Empiezas cambiando una cosita por aquí, otra por allá, del patrón ya hecho y sin darte cuenta estás haciendo tu propio amigurumi.
Saludos
Amada Gretel muchas gracias por ese tiempo y amor que nos dedicas al enseñarnos y aconsejarnos. Yo atesoro todo lo que nos transmites. Dios siga bendiciendo tu vida. Yo vivo en Cancun México y es muy fustante no encontrar los hilos que necesito, he visitado todase las tienda y realmente no encuentro variedad. Ahora que mi hija viajará a la capital me traerá una dotación importante de hilos. Es por esa causa que no logro empezar un proyecto, pero créeme que cuando eso suceda tu mi gran amiga serás la primera en verlo y deseo que con toda la confianza y amor que transmites seas sincera y comentes mi trabajo. Tu opinión para mi es muy importante. Te abrazo y beso. Mi cariño siempre. Gracias. :*
Qué lindas palabras Sofía!
Es un gusto leer tus mensajes tan llenos de cariño, amabilidad y buenos deseos. No puedo más que corresponderte de igual modo.
Me encantará ver todos tus trabajos y darte mi sincera opinión desde el cariño y el respeto que te tengo.
Un abrazo muy fuerte desde la distancia.
Muchas gracias por compartir tu sabiduría con tod@s nosotr@s. Llevo tiempo pensando en hacer diseños propios, pero no sé ni por dónde empezar, quizá sea un poco de miedito…. Je je je Lo intentaré y veremos qué sale.
Saludos y gracias
Gracias Ana Belén, muy amable, pero creo que la palabra “sabiduría” me queda muy grande… Sólo es mi experiencia, mis consejos por si os sirven de ayuda.
Y ahora me voy a poner seria y te voy a regañar. ¿Cómo es eso de que tienes un poco de miedito? Y hace tiempo que te lo estás pensando…
Nada, nada, fuera miedos y a por tu patrón. Prueba, inventa, juega, comienza con algo sencillo y poco a poco verás como sin darte cuenta va tomando forma y si no sale bien, pues lo deshaces o te lo quedas como tu “primer monstruito”
Saludos
Gracias por tu generosidad al compartirlos tu arte y experiencia y si algún día necesitas probar un patrón son gusto me ofrezco a tejerlo, será un honor para mí
Yo sin patrón me pierdo jajajajajaja pero ya, vez algún día me atreva
Mil gracias Cristina por tu comentario y tu ofrecimiento. Muy amable.
Saludos
Genial información !! Muchas gracias , ahora no estoy haciendo amigurumis pero toda tu información va a mi carpeta de IMPORTANTE !!!
Gracias por comentar, Pilar!
Para el futuro o tal vez te pueda servir en otros proyectos.
Saludos
Amei. Faz tempo que desejo eu mesma tejer meus próprios amigurumis ?. Vou atrás de fazer isso , realizar meu sonho , muito obrigada ? por me ajudar . Gratidão ?
Obrigada Alcione!
Com tanta vontade, tenho a certeza de que seus amigurumis serão muito fofos.
Beijinhos
Muchas gracias por compartir todos tus conocimientos con nosotras. ?
De nada Marta! Encantada de ayudar.
Saludos ?
Muchas gracias por el tutorial, me ha sido de gran ayuda. Me encanta el crochet, hasta ahora solo me había atrevido a improvisar en otro tipo de trabajos. Siempre me ha gustado poder idear mi propio patrón de amigurumi. Gracias por compartir, lo intentaré seguro!
Claro que sí Juani!
Anímate y ya verás que lo haces fenomenal. A por ello!
Saludos
Muchas gracias por compartir tus conocimientos,estoy empezando un proyecto ,lo llevaba muy bien haya llegar a la cabeza,es el abuelito up,no conseguido hacer esa forma,te agradecería que me digeras como puedo hacerla,es un trabajo importante para mi hija,muchísimas gracias?
Hola Paloma:
La verdad es que la cabeza es la parte más compleja de ese personaje y es muy difícil poder ayudarte. Yo la haría en varias partes, la parte principal y la parte de la boca y mentón. Cómo explicarlo? He buscado y creo que esta imagen puede ayudarte para hacerte a la idea https://aphid777.deviantart.com/art/Carl-Fredricksen-WIP-557937043
Saludos
Muchas gracias por todo lo escrito me ha sido de ayuda quiero realizar a la gallina turuleca haber q tal me va..